Making again
This is an extension of my last post: A brief musical journey, as well as a number of stories which I’ve been posting on Instagram in recent days.
As part of my of my adventures in the world of producing elecronic music I came across the fascinating world of modular synthesis. Modular synthesizers are composable musical instruments which are built up of many discrete modules, almost like the Lego bricks of synthesizers. Unlike traditional keyboard synthesizers which have defined signal paths modular synthesizers allow you to patch together whatever sequence of modules you want to create the sounds you desire. For a computer nerd like me it’s the perfect mix of music creation and programming. If you’re not familiar with it then I highly recommend taking a quick look at this introduction YouTube video to familiarize yourself with the idea as it’s much easier to understand through observation.
I read up on the subject for the while and eventually decided to dip my toes in the waters of modular synthesis by purchasing a used Moog Mother 32 semi-modular synthesizer on Reverb. The Mother 32 is a great introduction synthesizer because of it’s semi-modular design. What this means is that it is hybrid combination of both the traditional and the modular models. This means that while the Mother 32 has a default signal path allowing it to be used like a traditional synthesizer it is possible to use the modular patch bay to change the signal path as we would in a completely modular setup. The Mother 32 is compatible with the Eurorack modular format allowing it to be used in combination with other modules as part of a larger system.
There are endless hours of fun to be had in sitting down with a completely unpatched synthesizer and slowly exploring your way through the sonic space patch by patch. There’s also something charming to the ephemeral nature of it, as the fact that you have to physically recreate the exact state of the synth with each patch cable and knob in place to recall any particular sound means that you’re constanly encountering new variations.
After getting to know the Mother 32 quite well this past Christmas I was most fortunate to receive the gift of a Moog 104HP Eurorack skiff (HP = Horizontal Pitch, a standard unit of module width in the Eurorack format) designed to house the Mother 32 and another 40HP of Eurorack modules as an extended modular synthesizer. As I was contemplating what modules I might like to include in my rig I decided that I would take the opportunity of a fresh rig to set myself a maker challenge, something that I hadn’t done in a while as my time at Noisebridge reduced. I set myself the goal of only including DIY modules in my rig and set out looking at the world of DIY eurorack modules for inspiration.
Home setup
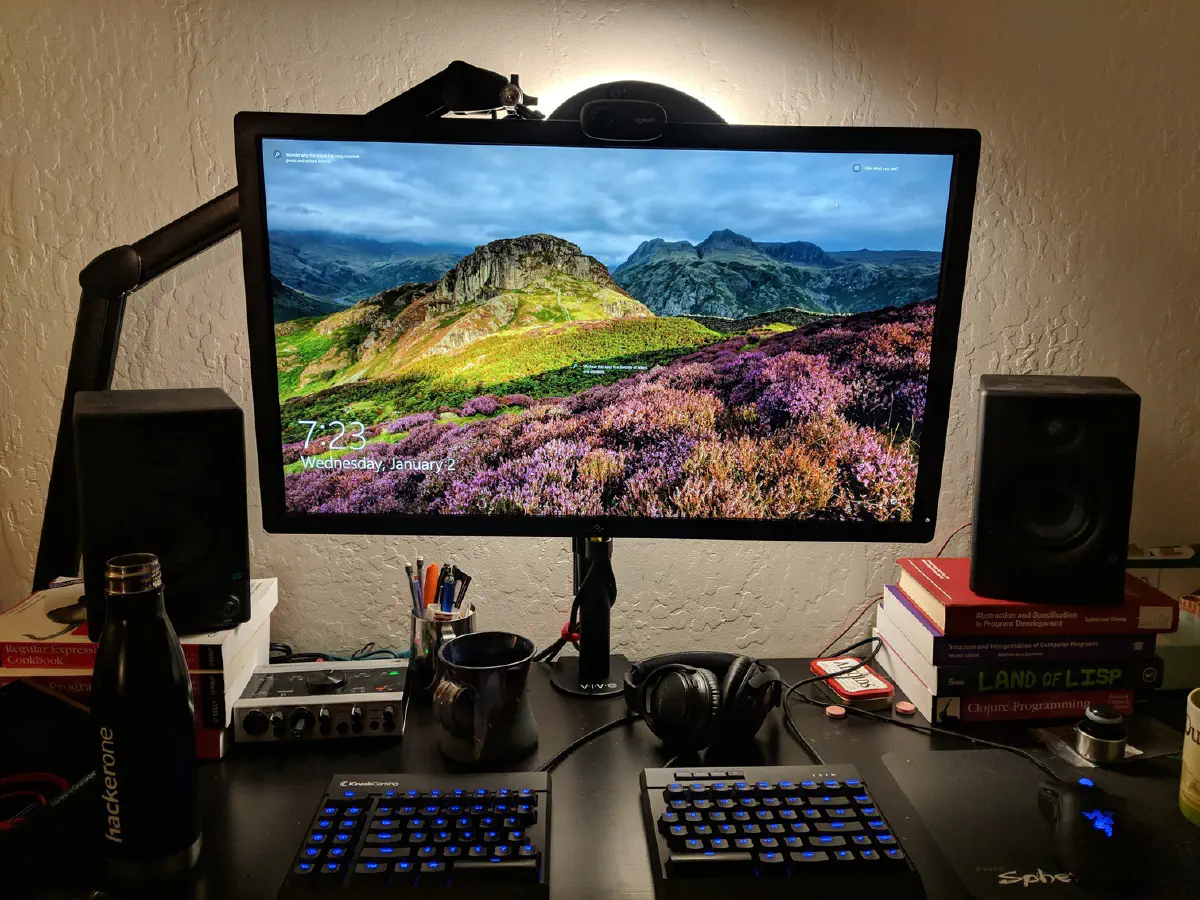
While I already had a basic soldering setup I’d not done much soldering at home before outside of minor repairs of small components. This project was going to be my first “serious” undertaking at home and so I was in need of some equipment upgrades first. The two best new additions to my setup are this 2.5X LED magnifying glass and a hot air station. The LED magnifying loop has adjustable brightness and also temperature which make working at night very comfortable on the eyes. On top of that the mounting arm allows me to tuck it behind my desktop monitor so it can serve as a backlight against the wall.
In the beginning was the tester
The first project I undertook was assembling a Mutable Instruments Module Tester, a test board designed by the prolific Émilie Gillet of Mutable Instruments fame. The Module Tester serves both as a convenient power supply for modules providing both the +5 and +12V rails required in the Eurorack format and also provides a bunch of signals debugging functionality such as test tone generation, tuning, CV modulation, gate measuring and more. Given that I hope to assemble quite a number of modules this seemed like an obvious first choice and useful tool to have along the way.
In addition the Module Tester is also a through-hole component project which meant that my first introduction back to soldering in a while would be relatively gentle instead of jumping straight into the deep end of SMD soldering.
At this point everything appears to be working correctly. The most difficult part in truth has been locating a suitable power supply as, unlike most wall warts used in household appliances in the US which use DC, the Module Tester requires a 12V AC 1A supply to function correctly. This led to an embarrassing episode when I realized I’d totally misread the markings on the adapter and had been led on a wild goose chase trying to root cause the broken tone generator only to find that I wasn’t providing the correct power.
Having located a suitable power supply in the interim and calibrated it everything appears to be in working order. My next step is to check the pin outs for the 16 pin adapter which is used to connect to child Eurorack modules under development. I want to be absolutely sure that the voltages are correct before I connect a development board lest I run the risk of destroying both in one go.
Here is the board in clock generation mode.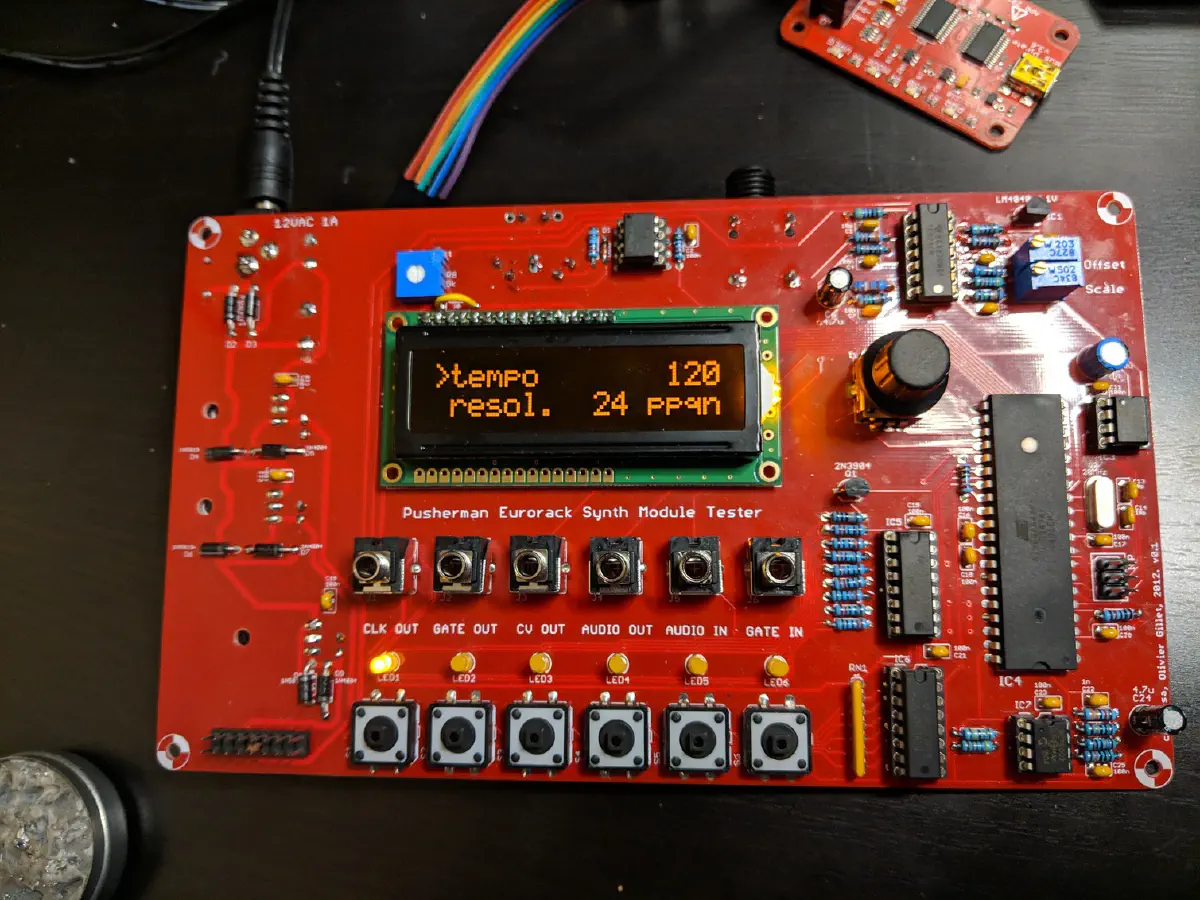
uBurst
Arguably one of the most known Eurorack modules is that of Clouds, a Mutable Instruments granular / texture synthesizer which is known for producing spectacular reverbs and granular chopped sounds that people love.
One of the most amazing things about Mutable Instruments is that after the first production run of each new module is released Émilie releases the software and hardware source code under a MIT license allowing a vibrant community of hobbyist makers to take inspiration and run with their own ideas. The results are often pretty spectacular, with a resulting ecosystem with a number of alternative firmware and module designs in the wild and actively being used by musicians the world over.
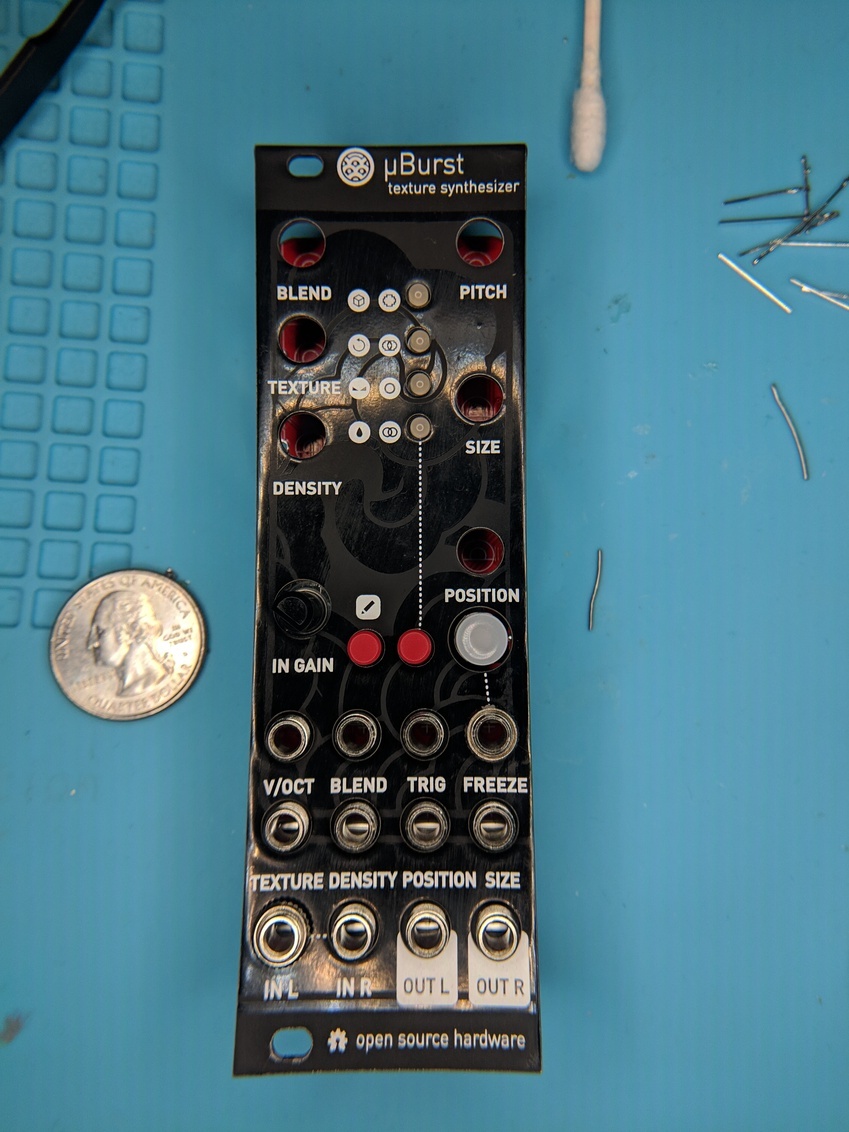
uBurst is one of these such inventions. It is as slimmed-down recreation of
Clouds in a much thinner package (8HP compared to 14HP in the original) which
makes a significant difference in the limited space in which I’m working. Here’s
a photo of the uBurst faceplate that I picked up. The panel will be fixed on top
of the PCB and then will in turn be mounted into the case using the screw holes
along the top and bottom edge of the panel.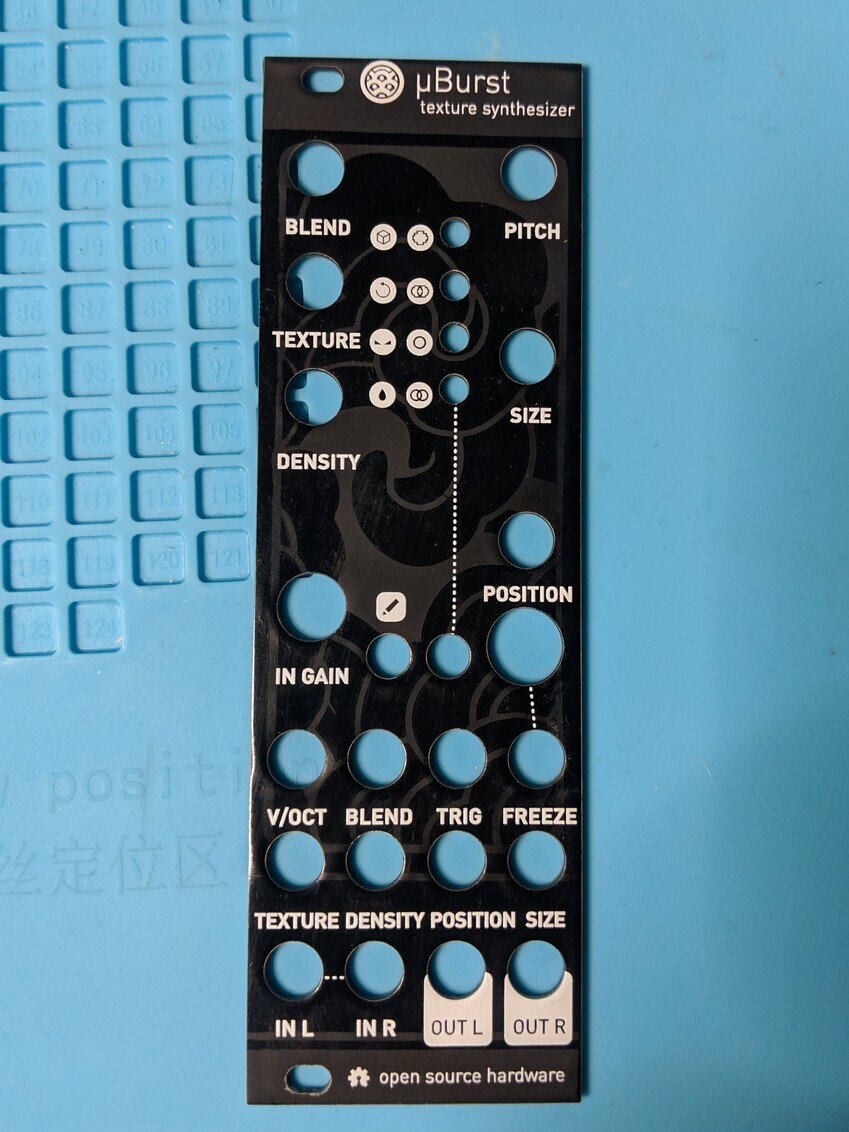
This is my first attempt ever at SMD soldering at home and so I decided use the hot air reflow station instead of using a hotplate to reflow the board after placing every component. While the former is slower it offers me the ability to give attention to each component individually as I’m working which is preferable for my first time around.
Here’s the results thus far!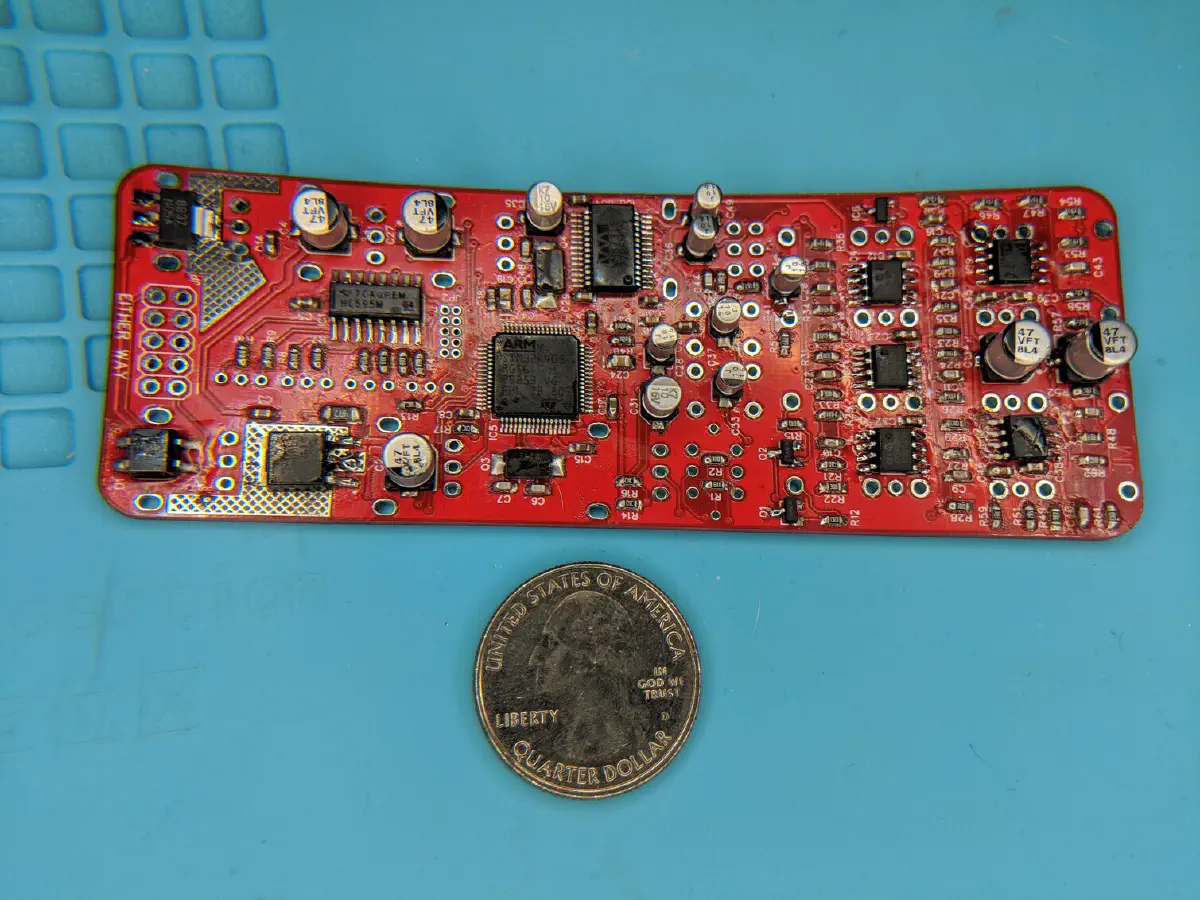
And here’s the almost assembled PCB (missing only the final potentiometers) with the front panel mounted.
At the time of writing the module is very near completely assembled, with all of the SMD components on the back side of the board and the vast majority of the through-hole parts installed. The final parts that I need to finish assembly are the potentiometers that serve as attenuator controls for the various CV inputs which I hope will arrive in the mail in the coming days. Unfortunately due to certain components being niche or in short supply it is not always possible to source all of the parts listed in a given Eurorack module’s BOM (Bill of Materials) from a single vendor such as Mouser. Thankfully however there is a great ecosystem of small vendors that stock all things Eurorack which we can turn to for the final elusive items.
Once I have the assembly complete and the power supply pinout confirmed on the Module Tester the next challenge will be flashing the STM32 with the Clouds firmware. This is done using the JTAG headers on the board. I’ve done some reading which suggests that I should be able to use my Bus Pirate with a more recent community supported firmware upgrade in combination with a tool called OpenOCD to accomplish this. I have yet to figure out how to upgrade the firmware on the Bus Pirate so that is my next area to research.
beginning and middle.
I hope to continue these posts on a semi-regular basis as I complete more builds and have the musical results to show for it. In the reading that I have done on the subject of modular synthesis one of the most often repeated pieces of advice for people starting out planning a rig is to have a specific direction in mind and work towards it as opposed to chasing the features of any given module. I’ve been listening to some really great modular techno recently, in particular stuff by Justin Owen of Abstract Data, a.k.a Jack Patch
It’s really great stuff, and it has inspired an interest in techno, and in particular modular techno that made me decide to dedicate this rig to live modular techno performances. With some luck and with the wind behind my back I would hope to be able to accomplish something minor in this field during 2019. Fingers crossed! Watch this space. T